If you want to start your own blog, there are many options for you to do it. There are free micro- blogging platforms, blog sites, and easy site builders that could work if you just want a space for you to write and share your content. This begs the question, why bother with a self- hosted blog where you spend money and go through several different processes you’re not familiar with? Well, if you’re serious about blogging, you’ll do it. Hosting your own blog gives you the flexibility and freedom to do what you want and mold your blog to your liking.
Most serious bloggers will get a self- hosted WordPress site. It’s easy to use and is open source for website and blog development. There are tons of popular hosting service providers that offer the platform and will register your domain. This is also one of the reasons people go for self- hosted blogs: getting your own domain. Free sites will have their domain tacked to yours like www.example.blogspot.com and having that doesn’t exactly scream professional.
Let’s turn you into the professional and dedicated blogger that you want to be.
What You Need
-
A domain name – Get it from your hosting.
-
WordPress.org account – Sign up at https://wordpress.org
Setup Steps
-
If you’re just starting, figure out what your niche, blog type, and needs would be.
-
If you already have a site, identify the specifications you’ll be needing from a host.
-
Find the host you want.
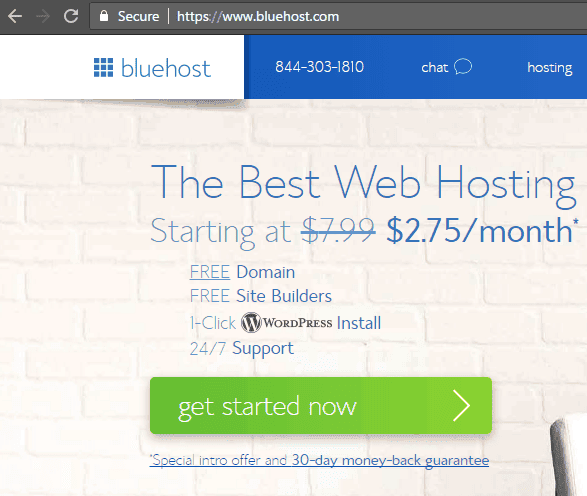
Purchase your domain and hosting. One of the top WordPress host providers is BlueHost. Here’s how you get it:
-
At https://www.bluehost.com, click get started now.
-
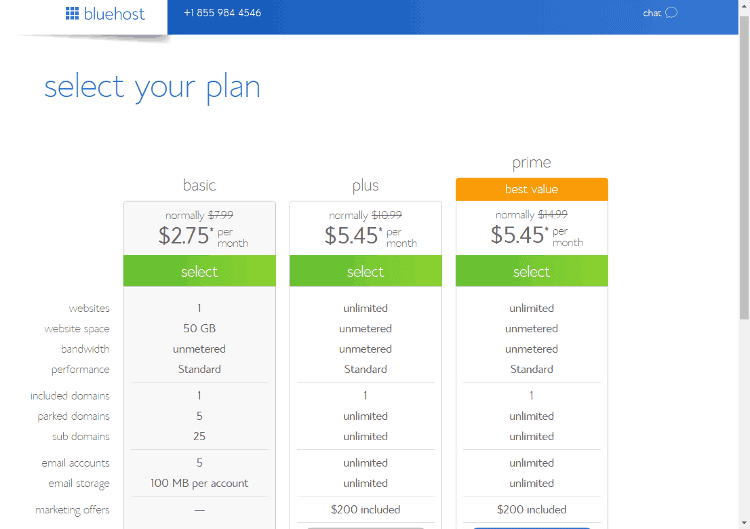
Choose your plan by clicking select on your preferred plan.
-
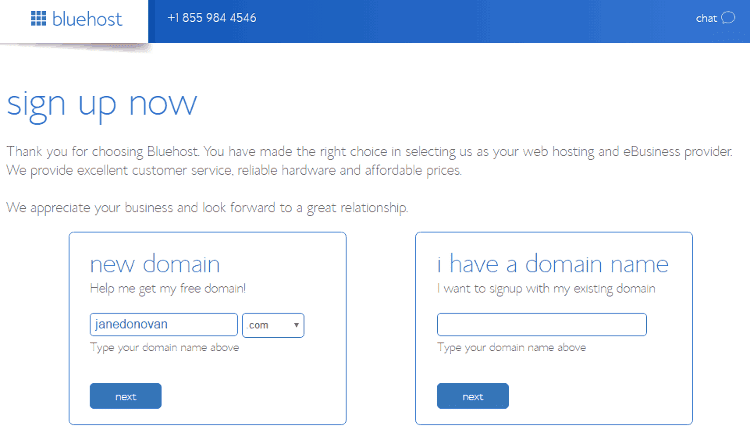
Enter your desired domain name > Click next.
-
Add your account information and finalize your package.
-
Check your email for details to log on to your hosting control panel (cPanel).
Install WordPress. You can do that from your host, just like this:
-
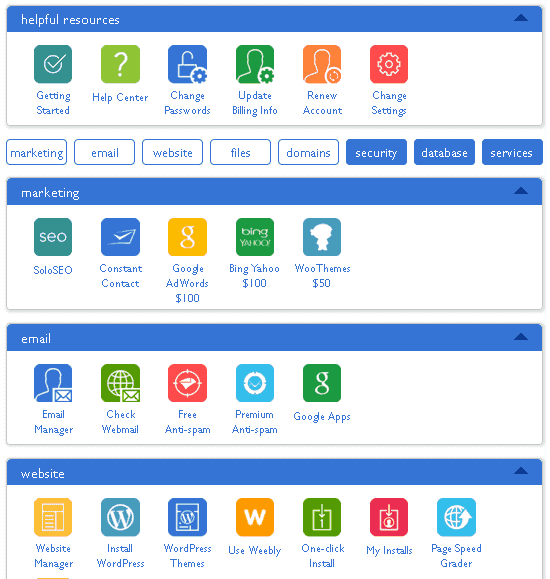
In the cPanel, scroll to the website section and click Install WordPress.
-
Select your domain name > Click Next.
-
Enter your site name, username and password > Check all checkboxes > Click Install.
-
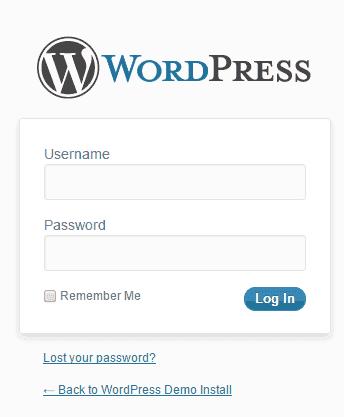
Check out the WordPress login link that will be generated after installation. It will look like this: http://yourdomain.com/wp-admin.
-
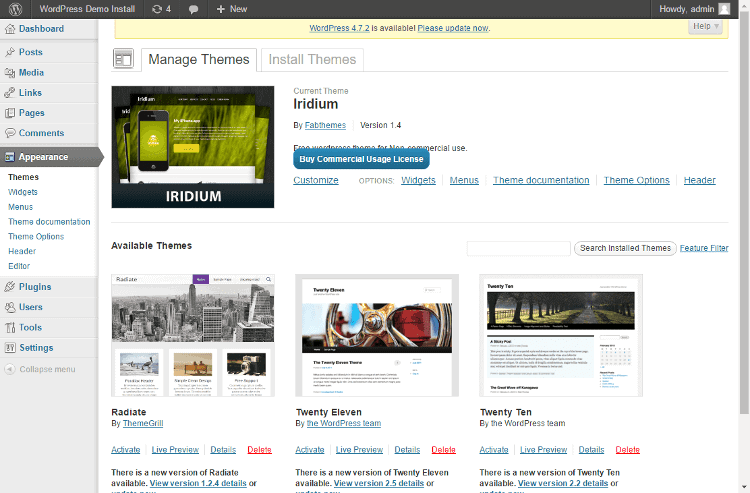
Select your WordPress theme by clicking Appearance > Themes > Add New.
-
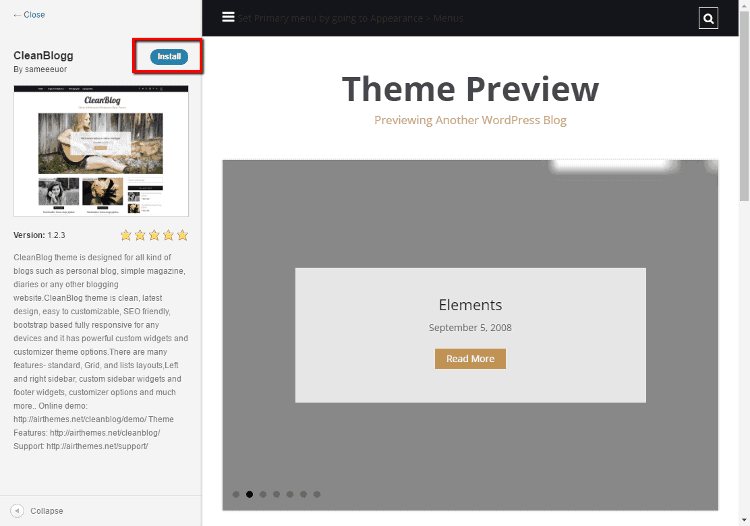
Sort available themes and select a theme > Mouse over your chosen theme > Click the Install button.
-
Once the theme has been installed, click the Activate button.
-
To customize your theme, click Customize under Appearance.
-
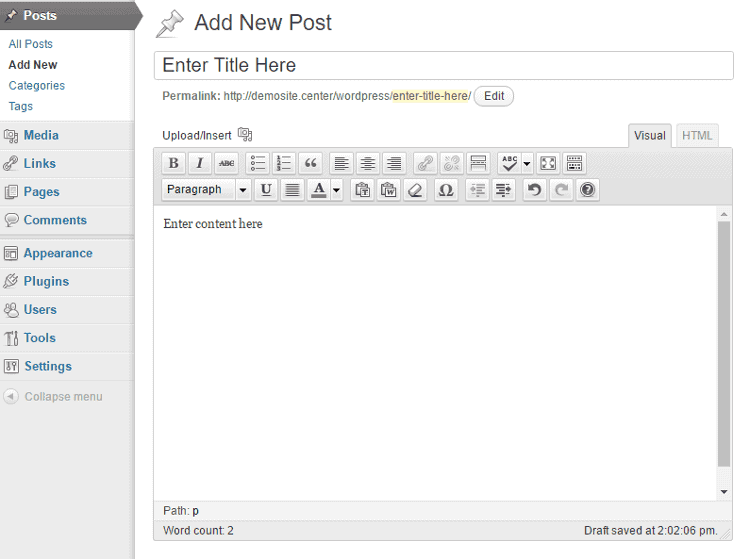
To write a blog post, click Posts > Add New from the WordPress dashboard.
-
Enter your blog post title in the title field and the content in the content field.
-
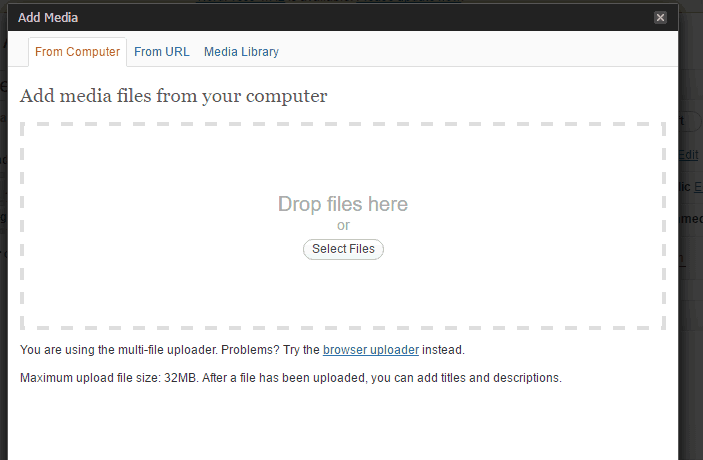
To add media, click Add Media.
-
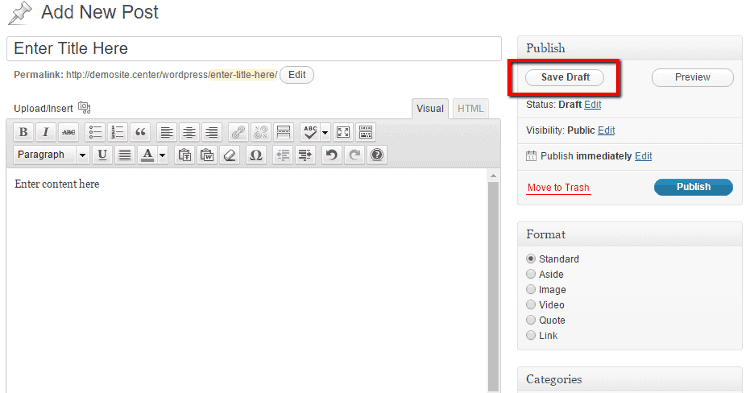
To save your post, click Save Draft.
-
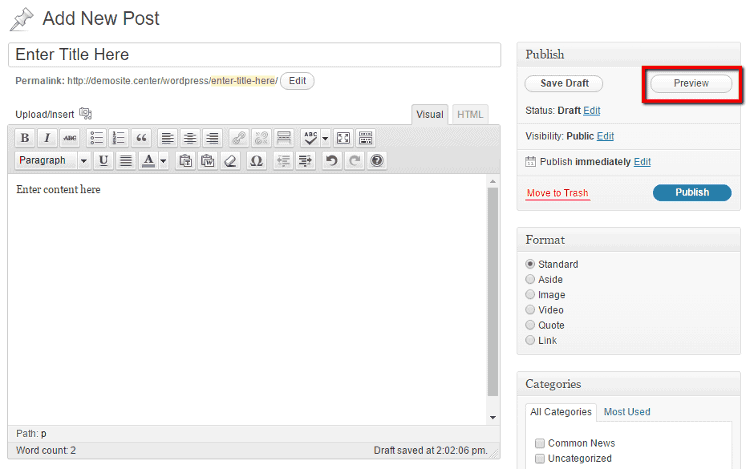
To preview your post, click Preview.
-
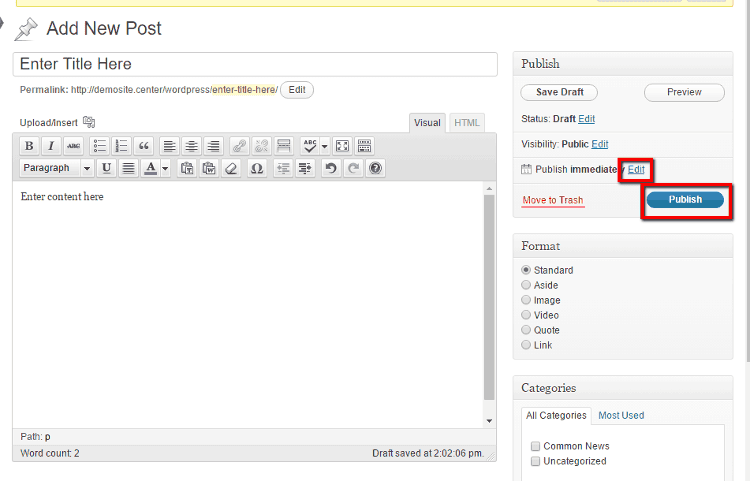
To publish your post, click Publish. To set publishing date and time of your blog post, click Edit beside Publish immediately.
Marketing Setup
-
Use email marketing to reach out to your audiences.
-
Connect with individuals and groups influential in your niche for influential marketing purposes.
-
Get visible on social media by building pages and groups on various social media platforms.
-
Create a blog and forum commenting to establish credibility and build relationships.
-
Submit your blog to directories and social bookmarking sites to increase visibility and traffic.
Timeframe
Time to do: 1 hour
Time to see results: 3 months
Additional Tips
Create interesting topics.
Invite audience engagement in your blog posts.
Support and enhance your content with infographics, images, and videos.
Use relevant keywords within your content and in your custom blog URLs.
Publish blogs on a consistent schedule.
Potential Results
Getting a self- hosted blog opens you up to more opportunities to make money. But it will take you a couple of months to gain visibility and enough traffic to feel like you are. Once you do, though, you can look to earn up to $500 a month for the first couple of months and, with a lot of hard work, earn $1,000 per month.


